When you have to create a client, there are six points you have to go through.
1) Select client type
Here you must choose whether the client is a company, a personally owned company, an association, a foundation, a public authority or a private person (or possibly other client types you have created yourself). Depending on the client type you choose, there will be a questionnaire associated with that client type. It is therefore very important that you choose the correct client type. This cannot be changed once the client is created.
2) Select client manager
The client manager you choose is basically the employee who must make the final self-assessment on the specific client.
You also have the option of assigning a secretary who will be responsible for the client getting to the stage where an internal check can be carried out.
3) Select performance
Here you must choose which service(s) you will perform for the client.
4) Client information
Here you choose whether it is a company with a VAT number or not.
If it is a company with a CVR number, you leave the selection unchecked in the "Company" fields, after which you enter the CVR number of the company in the box for this. The system will then come up with the match found in the cvr register. Click on this (see below).
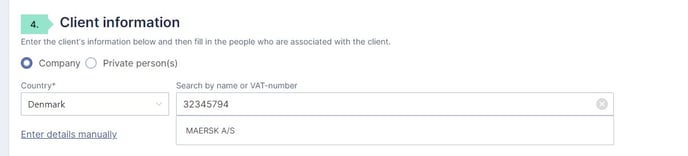
Once you've done this, you'll be given the option to enter the name of the client instead. Once you have done this, skip to point 4.1.
You have the option to enter additional information manually by clicking "Enter details manually", but this is not a requirement.
If it is not a company, you must instead move the selection to "Private person(s)". This applies regardless of whether it is a sole proprietorship, a private person or any other type of client, as long as they do not have a social security number (see below).
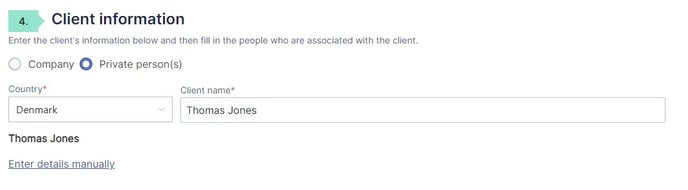 Once you've done this, you'll be given the option to enter the name of the client instead. Once you have done this, skip to point 4.1.
You have the option to enter additional information manually by clicking "Enter details manually", but this is not a requirement.
4.1) Personal information
If the client is a company with a cvr number, the system automatically obtains personal data on the associates in the cvr register. The persons who are beneficial owners or are estimated to be beneficial owners will automatically be associated with the case. You have the option of assigning additional people to the case via the "Add person" button, if you wish.
You must then choose which of the associated persons on the case will be the representative. The representative has an additional task in answering questions about the company and uploading any documents. Other persons on the case who are not representatives must only provide information about themselves.
Once you have chosen a representative, you must enter an email address for this representative. It will later be the representative's task to insert the email address of the other persons on the case. If you want the representative to answer on behalf of the other people on the case, this is also an option. You can read more about this function here: https://creditro.com/help/how-to-use-the-reply-on-behalf-of-function
5) Settings
The last point in creating a client is to choose the language in which emails and questionnaires are to be sent. When you have chosen this, you have the option to tags (internal notes) on the client in the "Client tag" column. You also have the option to deactivate or client questions (the company questionnaire) and requirements for documentation (company documents), if you want this. Finally, you can add a possible internal case number.
Once this is done, click "Create and Submit" and the client will be created (a pop-up message will confirm that the client has been created) and will now be under "In Progress" in the client overview. At the same time, an invitation email is automatically sent to the representative.
NB! The creation page has a time-out function, which means that you may experience a client not being created if you have spent longer than expected on the creation. If you find that nothing happens when you click "Create and send", you must reload the page (press F5) and then fill in the information again. After that, the creation should go through.